StudioSense: Framing a Pastel Against Glass
- Bob Palmerton
- Mar 26, 2022
- 3 min read
Framing a pastel directly against the glass is called passe-partout framing. I thought to myself, really? Pastels are traditionally framed with a spacer between the art work and the mat or glass, to enable any particles of pastel to fall and not "dusty-up" the inside glass. With the sanded papers on the market today, however, stray pastel particles occur less frequently in framed pastel paintings. But I wanted to give this a try, so I chose a small pastel painting and a simple 8x10 frame.
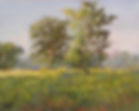
Here's the pastel painting, created en plein air (on site on a hot August morning) in the Pittsfield Preserve off Marton Road in Pittsfield Township, Michigan.

Below are the steps and images describing the process I used.
The first item to consider is that the pastel painting will be the same size as the foam core backing. So we need a way to secure the painting to the backing. I do a "hinge tape." That entails securing a tape sticky side up beneath the four sides of the painting, then securing a piece of tape sticky side down over the up-facing tape, and wrapping that around the back of the foam core. Below is a look at the back of the painting. But before I proceed my Saline Artist friend Linda Klenczar cautioned that the tape glue may affect the pastel surface. In retrospect, the weight of the glass and the white tape (you will see below) securing the glass to the back of the board should be enough to secure the pastel safely.

In the photo below, you can see the sheet of glass sitting atop a cloth-bound book (you can also see the reflections of my overhead lights)! I cleaned the glass, then secured a strip of Framer's Tape at two opposing edges of the glass.

Next step was to carefully settle the glass on top of the pastel painting. I pressed down on the glass in the middle of the painting as I secured one side of the work with the tape, pressing hard along the edge of the glass and securing it behind the foam core.

I did the same with two additional pieces of tape at the other ends.

Now I have a tightly-packaged, secure pastel painting! Next, I fit it into the back of the wooden frame (it fit quite snugly), then secured the piece. Here's the final framed version:

What was really cool about this process was that I could put the framed painting face down on a table to secure the backing without having to worry about any pastel flakes hitting the glass, as the pastel was tightly secure against the glass. This secure fit will prevent moisture or any other ailments from invading the artwork. This process also saves a little cost in that it needs no spacer or mat.
There's a wonderful article by Richard McKinley further demonstrating the process I used above. Click here for the article.
This tightly-secured package can be inserted into any frame, changing out pastels as desired. Although I don't frame a pastel against glass as a routine, I have preferred plein air frames without a mat. You can find a variety of matless pastels frames on my shop. Click here to see the unframed and framed versions of a variety of pastels.